The quality of your video work can be greatly enhanced by choosing a green screen studio for rent, which allows you to create dynamic and professional content. From selecting the right space to handling common challenges, this guide covers everything you need to know to set up a green screen studio for your next project.
Uses of Green Screen Studio for Rent
Green screen can be said as chroma keying is when you replace the background of an image having a green backdrop with any other image or video during post-production. It’s technique that is widely used in film, TV and online content creation because of several reasons such as;
- Flexibility: through a green screen studio you can place your subjects anywhere, real or unreal.
- Professionalism: The use of green screens helps create polished, high-quality videos that stand out.
- Cost-effectiveness: Having a controlled environment, like shooting with a green screen studio, can save on location expenses and travel.
Creating a Green Screen Studio for your new Project
Choosing the Right Space
Setting up a chroma green screen studio begins with choosing an appropriate location. Lighting equipment, camera gear and subject must all fit into the space. Consider these factors:
- Size: A big room allows more flexibility with camera angles and light setups while avoiding shadows and lighting issues.
- Height: Ensure your ceiling is high enough so lights don’t cast shadows on the cloth used for Chroma keying purposes called ‘green screens’.
- Control: It is necessary to have an isolated space where you can control sound as well as light. External light and noise may interfere with recording quality.
Getting the chroma Green Screen
The actual green screen itself is an important part of your setup. There are many different types of materials that can be used in making a green screen, such as fabrics, papers and even paints. The following factors should be considered while purchasing a green screen:
- Material: Fabric on the other hand lasts long and can be easily folded for storage while paper gives a smooth and unwrinkled surface. A painted wall will serve best as it does not wrinkle.
- Color: Ensure that the chroma green screen is uniform in color and very bright. Do not go for shades that are too dark or too light as they may affect chroma keying.
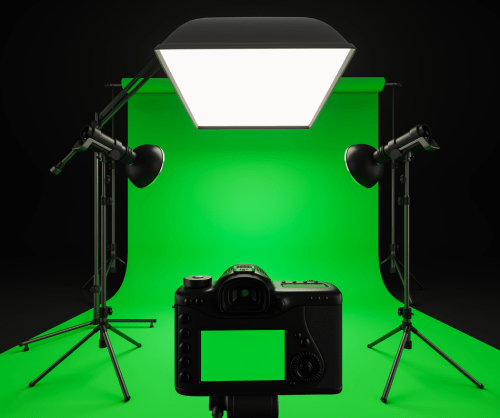
Setting Up Lighting
When setting up a chroma green screen studio, adequate lighting is crucial. Poor lighting can lead to shadows being cast on the subject thus making chroma-keying cumbersome. Observe the following steps to get your lighting right:
- Even Lighting: Light up the green screen evenly with no shadows or hot spots at all. If necessary, use multiple sources of light.
- Separation: Lights should be used to separate your subject from the green screen so that some of this color doesn’t reflect on him/her.
- Three-Point Lighting: Your subject ought to be illuminated using three point lights (key light, fill light, backlight). This ensures a balanced look with minimized shadow lines.
Camera Positioning
Proper camera positioning is very important for optimal results when using a green screen studio for rent. Consider the following:
- Distance: Keeping the subject clear and sharp, place the camera far enough away to avoid wide-angle distortion.
- Focus: Make sure that the subject remains in sharp focus while lighting falls evenly on the green screen and out of focus slightly to avoid texture showcase.
- Framing: Framing should be such that only a minimal amount of green screen will be visible, thus lowering post-production work needed to key out background.
Subject Preparation
Besides, you need to well prepare your subject for a perfect green screen effect. The following are some tips:
- Wardrobe: In order not to make parts of your subject disappear in the final video due to blending with a green screen; never use clothing which is green in color.
- Movement: Ensure that there are no shadows cast on the green screen by the subject while he/she moves naturally. Do not bring the subject close to the green screen at all times if they do any movements.
- Positioning: To prevent shadowing as well as color spillage, one must take care not to come very close to a green screen during shooting. This space ensures adequate light on both subjects and even lighting on backdrops.
Post-Production Tips
However, once you have your footage shot, the final magic happens in post-production. What is Chroma Key Processing?
- Editing Software: Choose user friendly software with strong keying capabilities for instance Adobe Premiere Pro, Final Cut Pro or DaVinci Resolve.
- Keying: Apply chroma key effect to remove green screen background. Majority of programs allow you to select green color and provide tools for this purpose.
- Refinement: Adjust the keying settings in order to get rid of any green edges around your subject. By playing with these parameters, one can achieve a neat and professional look.
Essential Equipment for a Green Screen Studio in your first Project
When putting up a green screen studio, it is important that you have all the necessary equipment. What you will require:
- Green Screen Material: Use fabric or paper or paint as your green screen.
- Lighting Kit: Softboxes, LED panels and diffusers are useful in achieving even lighting.
- Camera: The best results are produced by a high-definition camera capable of shooting in HD or 4K footage.
- Tripod: Stability is important for consistent shots; hence use a tripod to hold your camera steady.
- Microphone: Capture sounds through good quality microphones because clear audio is important for quality videos too.
- Editing Software: For Post Production, choose easy-to-use software with robust keying capabilities.
Troubleshooting for Regular Problems
There are certain common problems when establishing a green screen studio. The following are some answers to some of these normal issues:
- Shadows on Green Screen: Adjust light conditions and make sure the subject is far enough from the green screen so that no shadows cast.
- Uneven Lighting: Use supplementary lights or diffusers to balance illumination, adjusting their distances accordingly.
- Color Spill: Increase the distance between the subject and screen, using backlighting to reduce spillage.
- Blurry Edges: Refine your editing software’s keying settings until you can sharpen edges and get rid of any unnecessary artifacts.
Advantages of a Green Screen Studio
A number of benefits come along with working in a green screen studio space :
- Flexibility: The ability to change backgrounds easily depending on your video’s narrative or visual style.
- Consistency: All scenes should be shot within a controlled environment where lighting and sound remain uniform throughout.
- Cost Efficiency: Using a green screen enables one save on location and travel expenses.
Conclusion
Your content creation can be taken to a completely different level with the help of a green screen studio.By adopting this process and ensuring that one has all the right tools, use can achieve professional quality results. One must pay close attention to even lighting, proper preparation of subjects as well as comprehensive post-production efforts. With such a well-equipped studio, it is practically impossible to exhaust creativity aspirations stemming from it. we help you to click perfect video and photshoot in our green screen studio at alamelustudios.