There has never been a more significant time to create YouTube content than now. With so many channels fighting for views, having a professional setup could be the difference between gaining an audience or losing them halfway through. This article will help you choose the best video studio for YouTube videos. You need an environment and equipment that will allow you to produce eye-catching and polished work. This guide will also explain why one should set up their own YouTube studio.
Why You Should Use A Studio for youtube videos
Before settling on the best video studio for YouTube videos, it’s important to be aware of the advantages that come with having a professional setup. The benefits that accrue to you from owning a space include:
- Consistency: when all is said and done, everything will seem consistent – having controlled settings can help in achieving this look.
- Quality: Great lighting as well as soundproofing, among other high-quality equipment, enhance visual and aural aspects of your video, thus improving the viewer experience.
- Efficiency: Everything becomes easier during production when there is a designated area, which saves time while reducing stress levels.
Factors to Consider When Choosing a Youtube Studio for videoshoot
There are several things that matter when selecting the best studio for YouTube videos.These factors help to find a location within your budget but still meet all other requirements necessary during setting up, thus making it effective.
Location
- Accessibility: if possible, choose somewhere near, especially when working with others;
- Noise levels: avoid shooting in areas with lots of disturbance;
- Safety: go for secure places because sometimes expensive equipment may be left behind.
-
Space and Arrangement
The size and design of a room used as a YouTube video studio have different implications
- Sufficiency-sets, storage of equipment, movement, etc., should have enough space; Ceiling height: higher ceilings give more freedom in terms of lighting design and sound management;
- Flexibility—adaptability matters most since different types of content may require different setups, e.g., sitting-down vlogs, tutorials, or even bigger productions.
- Lighting-Lighting is one thing in video production that can either make or break everything else. Look out for:
- Natural light is beautiful but unpredictable, so be ready with curtains or blackout blinds for light level control;
- Artificial lights: Invest in high-quality studio lights like softboxes, ring lights, and LED panels, which offer even flattering light.
2. Sound Proofing
Audio quality should never be compromised at any given time in the best YouTube video studio. Take a look at these tips:
- Acoustic Treatment
Use foam panels, carpets, and curtains to reduce echoes caused by the room’s size and outside noise.
- Soundproofing
Consider what needs to be done so that ambient sounds around your location do not become a significant distraction.
3. Equipment
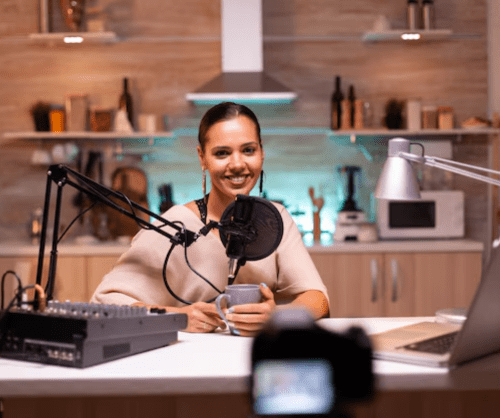
Having the right gear sets up one YouTube video for success—below are some must-haves in every YouTube studio setup:
- Camera
A high-quality camera is essential; it depends on what you want within your budget. DSLRs or mirrorless cameras will work perfectly fine, but even premium webcams can do it.
- Microphone(s)
Invest in great mics that record good audio, such as Lavalier or Shotgun mics; USB condenser ones also work well.
- Tripods and Stabilizers
Gimbals are great for stable shots, and a good tripod will keep the camera still.
- Backdrops
Green screens, paper rolls, fabric—different types of backdrops can mix up content creation in a studio.
Creating Your Studio for youtube videos
After selecting the best studio for YouTube videos, setting it up to produce optimal content is next. Here’s how to do an effective YouTube studio setup:
- Plan Your Layout
Make a rough sketch of where everything will be placed, including lights, camera, and backdrop. Make your studio flexible and adjustable when necessary so that you are empowered; this allows you to adapt to filming situations and ensures the best results.
- Lighting Setup
First things first: install lighting in your studio. These comprise vital lights, fill lights, and backlights, which help create balanced illumination that flatters videos; try different angles and intensities so that there are no shadows or overexposure.
- Better Sound Quality
To improve sound quality, put acoustic materials on the walls and floors so that they absorb sound waves by reducing echo reflections within the room. Place a microphone near the recorded person speaking to ensure clear recording of audio then modify through tests of sound.
- Test and Adjust
Do test recordings to see if everything has been set up well; this helps identify any lighting, sound, or framing issues before actual shooting starts—an important step, especially when aiming at professional output quality.
Advanced Tips for Improving Your Studio
To make the best YouTube video studio, consider these additional suggestions when optimizing your YouTube studio setup:
- Multiple Camera Angles
Using multiple cameras during filming creates dynamism in shots; hence, extra cameras can be set at different points of view (POVs), which can be switched between while editing.
- Advanced Editing Software
Get professional editing software like Adobe Premiere Pro or Final Cut Pro; these programs have features such as color correction, audio enhancement, and special effects, among others, that enable one to produce high-standard videos.
- Green Screen
Use a green screen in your studio, which allows you to substitute the background with any image or video, hence making content more flexible; ensure it is well-lit and smooth for best results.
- Live Streaming Setup
If planning on doing live streaming, ensure there is a good internet connection at the studio; also, capture cards and streaming software should be used. Test the setup well so that there are no technical problems during live broadcasts.
Budget Considerations
You don’t need much money to create the best YouTube video studio. Here are some tips for setting up a budget-friendly YouTube studio:
- Start Small
Begin with the basics, then gradually upgrade equipment as the channel grows; focus on high-impact items, e.g., getting a good camera and microphone.
- DIY Solutions
Many things can be improved through applying DIY techniques, e.g., soundproof panels can be made from scratch or by using household materials for acoustic treatment.
- Second-hand Machinery
Think about buying used or restored equipment; various well-known internet marketplaces offer cheap second-hand products that are as good as new.
Conclusion
For you to create unique and thrilling content, there is a need to find the best studio for YouTube videos. Look at location, space, lighting, soundproofing, and equipment, among other things, that can help in setting up a working YouTube studio. Be well-planned with your layout, try different optimizations for your setup, and learn more advanced tips that can enhance the production quality so as to come up with an effective YouTube Studio setup. The decision on which studio to go for should not be taken lightly because this could either make or break your success story on the YouTube channel; it’s all upon you.